You captured an EVP session at a reportedly haunted location, hit playback, and all you hear is a wall of hiss, hum, and ambient rumble burying whatever might be underneath. Raw audio from paranormal investigations is rarely clean, HVAC systems, wind, electrical interference, and recorder self-noise all compete with the faint anomalies you’re trying to document. That’s exactly where Adobe Audition noise reduction becomes an essential part of your investigative workflow.
Adobe Audition gives you surgical control over unwanted sound without destroying the subtle details that matter most in evidence review. Whether you’re isolating a potential voice buried under static or cleaning up a hours-long ambient recording, the software’s dedicated noise removal tools are built for precisely this kind of work. But knowing the tools exist and knowing how to use them effectively are two very different things.
This guide walks you through the full process, from capturing a noise print to applying adaptive noise reduction and restoring clarity to your audio files. At Haunt Gears, we spend a lot of time testing and reviewing paranormal investigation equipment, and we know that gear is only half the equation. What you do with your recordings afterward determines whether potential evidence holds up or gets dismissed. Let’s get your audio clean.
What you need before you start
Before you touch any noise reduction settings, you need the right foundation in place. Adobe Audition noise reduction tools are powerful, but they cannot compensate for missing information, poor monitoring gear, or the wrong file format going in. Getting your setup right before you open a single recording will save you significant time and prevent you from having to reprocess files from scratch.
Skipping the setup phase is the most common reason cleanup sessions produce worse results than the original recordings.
Software version and system requirements
Adobe Audition runs on a subscription through Adobe Creative Cloud, which you can access at adobe.com. For noise reduction work, you need at least Audition version 14 or newer, as earlier builds had instability with the Adaptive Noise Reduction effect inside multitrack sessions. Your computer also needs enough processing headroom to handle real-time effects without dropout artifacts, especially if you are working with hours-long investigation recordings.
Here is a quick reference for minimum and recommended system specs:
| Spec | Minimum | Recommended |
|---|---|---|
| RAM | 8 GB | 16 GB or more |
| CPU | Intel Core i5 or equivalent | Intel Core i7 / AMD Ryzen 7 |
| Storage | 4 GB free (SSD preferred) | 20 GB+ free SSD |
| OS | Windows 10 / macOS 11 | Windows 11 / macOS 13+ |
| Audio Interface | Built-in soundcard | Dedicated USB or Thunderbolt interface |
Audio files and recording conditions
You need your raw, unprocessed audio files before you do anything else. Do not bring in files that have already been compressed or processed by your recorder’s internal settings, because those files have lost audio information you cannot recover. If your recorder allows you to save in WAV or AIFF format at 24-bit depth and at least 44.1 kHz sample rate, always use those settings in the field.
Your recordings should also contain at least five to ten seconds of isolated ambient noise captured at the start or end of each session. This is your noise floor reference, and Adobe Audition uses it to build the noise print in Step 2. If your files do not have this quiet section, the noise print process becomes a guessing game rather than a precise measurement.
Monitoring gear matters
You cannot accurately judge noise reduction results through laptop speakers or consumer earbuds. Small speakers mask low-frequency rumble and smear the subtle details that matter most in paranormal audio review. You need either a pair of closed-back studio headphones or studio monitor speakers in a quiet room to hear what you are actually doing to the recording.
Here are the monitoring types that work well for this kind of detailed audio work:
- Closed-back over-ear headphones: Block outside noise and give you an accurate picture of the recording. Well-suited for late-night review sessions at home.
- Studio monitor speakers: Reveal the full frequency range and help you catch over-processed audio that headphones sometimes hide. Use these in a treated or quiet room.
- Avoid: consumer earbuds, Bluetooth headphones with audio enhancement features, and built-in laptop or phone speakers for any critical listening.
File organization before you open Audition
Set up a clear folder structure on your hard drive before you import anything. Create a parent folder named after the investigation location, then add subfolders labeled “Raw,” “Working,” and “Exports.” This step matters because Adobe Audition’s multitrack sessions reference files by their original file path, and moving files mid-project breaks those links and forces you to relink everything manually before the session will play correctly again.
Step 1. Make a clean copy and inspect the noise
Before you apply any adobe audition noise reduction processing, you need to protect your original recording and understand exactly what you are dealing with. Skipping this step is how investigators accidentally destroy unreplaceable evidence audio. You want to know the character and source of the noise before you try to remove it, because different noise types respond to completely different tools inside Audition.
Duplicate the file before you edit anything
Open Adobe Audition, go to File > Open, and load your raw WAV or AIFF file. Once it appears in the Files panel, right-click the file and select Duplicate. Rename the duplicate with a clear label like “Investigation_Location_Working_v1.wav” and save it into the Working subfolder you created during setup. Close the original file and do not touch it again during this session.
Always keep your original recording untouched in the Raw folder. Every editing decision you make should happen on the duplicate.
This approach gives you a safety net at every stage of the cleanup process. If you push noise reduction too hard and lose detail, you can re-duplicate the original and start over without any loss of data. Adobe Audition does offer non-destructive editing in Multitrack view, but working with an explicit copy protects you against accidental saves in Waveform view, which writes changes directly to the file on disk.
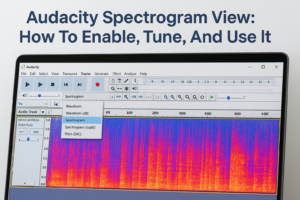
Inspect the noise using Spectral Frequency Display
With your working copy open in Waveform view, navigate to View and enable the Spectral Frequency Display. This shows your audio as a color-coded frequency map over time rather than a standard waveform. Noise problems become visually obvious here because they appear as consistent horizontal bands across the entire length of the file.

Look for these specific patterns during your inspection:
- Continuous horizontal band below 200 Hz: Low-frequency rumble from wind, HVAC systems, or handling noise.
- Thin horizontal line at 60 Hz or 120 Hz: Electrical hum from a power source or lighting interference.
- Broad, even coloring across the high frequencies: Consistent hiss from recorder self-noise or tape hiss.
- Scattered bright spots: Random clicks, pops, or transient interference events.
Zoom in on the first ten seconds of your recording where you captured the ambient-only section. Compare the frequency content there to a section that contains potential audio events. This visual comparison tells you exactly which frequencies belong to the noise floor versus which ones contain signal worth preserving.
Step 2. Capture a noise print the right way
The noise print is the foundation of adobe audition noise reduction, and a bad sample will corrupt every step that follows. Audition analyzes the noise print to identify which frequencies belong to background interference and which belong to actual audio events. If you feed it a sample that contains signal, it will treat your evidence audio as noise and remove it along with the hum and hiss you actually want gone.
Locate and select the right noise sample
Open your working file in Waveform view and zoom into the ambient-only section at the start or end of the recording. You are looking for a segment with no voices, knocks, or any other transient sounds, just the raw noise floor of the recording environment. A selection between five and ten seconds gives Audition enough data to build an accurate frequency profile without over-representing any single moment of noise.
Use the Time Selection tool (keyboard shortcut T) to highlight this section. Listen to it first using the spacebar before you commit to it. If you hear anything other than steady ambient noise inside those seconds, move the selection earlier or later until you find a cleaner stretch. Precision here directly determines how cleanly the noise reduction will separate noise from signal later.
A noise print taken from a section with even one audible anomaly will cause Audition to suppress similar sounds across the entire file.
Run the Capture Noise Print command
With your clean selection highlighted, navigate to Effects > Noise Reduction / Restoration > Capture Noise Print, or use the keyboard shortcut Shift+P. Audition will analyze the selected region and store the frequency profile in memory. You will not see a dramatic change on screen, but the profile is now ready to apply.

From the same menu, open Noise Reduction (process). In the dialog that appears, you will see the noise print loaded automatically at the bottom of the window. Before you apply anything, click Save Current Settings as a Preset using the floppy disk icon in the top right corner of the dialog. Name it with the location and date, for example “Waverly_Hills_2026_05_10_NoiseFloor.” Saving the preset means you can reapply the same noise profile to every recording from that session without capturing a new print each time, which keeps your results consistent across multiple files from the same investigation night.
Step 3. Apply Noise Reduction in Waveform view
With your noise print captured and your working file still open in Waveform view, you are ready to run the actual reduction. This step is where most investigators make the mistake of pushing settings too high in pursuit of a completely silent background. Heavy noise reduction removes signal along with noise, and for paranormal audio review, the detail you strip out could be the anomaly you were trying to document in the first place.
Set the Noise Reduction parameters
Open Effects > Noise Reduction / Restoration > Noise Reduction (process). The dialog loads with your captured noise print visible as a frequency curve at the bottom. Three controls determine how aggressively the adobe audition noise reduction engine processes your file:

| Control | What It Does | Recommended Starting Point |
|---|---|---|
| Noise Reduction % | Sets how much of the identified noise frequencies get attenuated | 60-70% |
| Reduce By (dB) | Sets the dB reduction applied to noise-identified areas | 10-15 dB |
| Smoothing | Blends transitions to reduce musical noise artifacts | 1-2 |
Start with Noise Reduction at 65% and Reduce By at 12 dB. Click the play button inside the dialog to preview the result on the current selection before committing. Listen for unnatural warbling or a metallic quality in the audio, which signals that you have pushed the reduction too far and need to pull both values back before applying.
Drop the Noise Reduction percentage and the Reduce By value by 10-15% the moment you hear any warbling in the preview, then listen again before applying anything.
Apply and check what you removed
Before you click Apply, enable the Output Noise Only checkbox in the lower section of the dialog. This routes only the audio that Audition plans to remove to your headphones, letting you confirm whether you are cutting noise, signal, or a mix of both. If you hear recognizable voices or distinct anomalous sounds in the noise-only output, your settings are too aggressive and you need to reduce the Noise Reduction percentage further before proceeding.
Once you are satisfied with the preview, uncheck Output Noise Only and click Apply. Audition writes the changes directly to your working copy in Waveform view. Zoom into the Spectral Frequency Display immediately after applying and compare the result to what you saw during your inspection in Step 1. The consistent horizontal noise bands should be visibly reduced without affecting the frequency content of any audio events captured during your investigation session.
Step 4. Use Adaptive Noise Reduction in Multitrack
Adaptive Noise Reduction works differently from the standard Noise Reduction process you ran in Step 3. Instead of working from a fixed noise print, it analyzes noise dynamically in real time, which makes it the right tool when your recording environment shifted during the investigation. If the HVAC kicked on partway through your session or the wind picked up outside, the noise floor changed, and a single static noise print cannot accurately represent all of those variations across the full recording.
Set up your multitrack session
Open a new Multitrack Session by going to File > New > Multitrack Session. Name it after your investigation location and set the sample rate to match your source files, typically 44100 Hz or 48000 Hz. Drag your working copy from the Files panel into the first audio track, and keep any reference recordings on separate tracks so you can compare them without merging any content together.
Apply Adaptive Noise Reduction as an effect
Click the track to select it, then open the Effects Rack in the Properties panel on the left side of the screen. Click the Add Effect dropdown, navigate to Noise Reduction / Restoration, and select Adaptive Noise Reduction. The effect loads directly into the rack and processes audio in real time without writing permanent changes to your file, which gives you full flexibility to adjust or remove settings at any point during your session.

Adaptive Noise Reduction in Multitrack view is non-destructive, so you can adjust or remove the effect at any time without re-importing your original file.
This is where adobe audition noise reduction gives you a clear advantage over static processing. The four controls you will use most are:
| Control | Function | Recommended Starting Value |
|---|---|---|
| Reduce Noise By | Sets the dB reduction applied to detected noise | 10-15 dB |
| Noisiness | Tells Audition how much of the signal is noise | 40-55% |
| Fine Tune Noise Floor | Adjusts the detection threshold up or down | 0 (adjust by ear) |
| Signal Threshold | Determines when Audition treats audio as signal vs. noise | -20 dB |
Listen and fine-tune before you commit
Play the track through your headphones and adjust Noisiness and Reduce Noise By in small increments while the audio plays back. Raise Noisiness if consistent background noise remains audible, and lower it the moment you hear any warbling or metallic quality in the audio you are trying to preserve.
Watch for these specific warning signs during playback and adjust accordingly:
- Warbling or wavering quality: Pull Noisiness down by 5-10% and listen again.
- Metallic or robotic tone: Reduce the Reduce Noise By value by 3-5 dB.
- Noise returning during quiet sections: Raise Fine Tune Noise Floor by 2-3 units.
Step 5. Fix hum, clicks, and other artifacts
Even after you run adobe audition noise reduction to address broadband hiss and ambient interference, specific artifacts often remain. Electrical hum, random clicks, and digital pops are point-source problems that require dedicated tools rather than broadband noise reduction. Audition includes individual effects for each of these artifact types, and using them in the right order produces far cleaner results than trying to handle everything with a single effect.
Remove electrical hum with the Notch Filter
Electrical hum typically sits at 60 Hz in North American recordings because it mirrors the AC power line frequency. It also produces harmonic overtones at 120 Hz, 180 Hz, and 240 Hz that stack on top of each other and create a layered buzz throughout your recording. You need to target each of these frequencies individually rather than cutting a wide swath of low-end audio that will also remove legitimate bass content from your investigation recordings.
Open Effects > Filter and EQ > Notch Filter. The dialog presents a grid where you add precise frequency cuts. Enter the following values to address a standard 60 Hz power hum and its harmonics:
| Frequency | Gain | Q (Bandwidth) |
|---|---|---|
| 60 Hz | -30 dB | 10 |
| 120 Hz | -24 dB | 10 |
| 180 Hz | -18 dB | 12 |
| 240 Hz | -12 dB | 12 |
Decrease the gain values incrementally if the hum source is weaker in your recording. Preview the result inside the dialog before you apply, and check the Spectral Frequency Display afterward to confirm those specific frequency lines have been reduced without disturbing the surrounding audio content.
If your recorder operates in a 50 Hz power environment, such as outside the United States, start your notch at 50 Hz and build harmonics at 100 Hz, 150 Hz, and 200 Hz instead.
Eliminate clicks and pops with the DeClicker
Random clicks come from static discharge, loose cable contacts, recorder buffer issues, and digital interference during the session. Each click appears as a sharp bright spike in the Spectral Frequency Display and sounds like a brief crack or pop on playback. Audition’s DeClicker effect targets these transient events specifically without touching the audio on either side of them.
Open Effects > Noise Reduction / Restoration > DeClicker. Set the Threshold between 20 and 30, which controls how sensitive Audition is to detecting transient spikes. Run the Scan for Clicks function first to let Audition identify candidates, then preview the result and raise the Complexity setting to 24 if softer clicks remain after the initial scan. Apply once you confirm the preview sounds clean.
Step 6. Reduce reverb and room tone issues
Reverb and room tone are separate problems from broadband noise, and standard adobe audition noise reduction tools will not touch them. Reverb is the decay tail that follows every sound inside an enclosed space, whether that is a stone basement, a tiled hallway, or a large ballroom. It smears transient events and makes faint anomalies harder to distinguish from the room itself. Audition’s DeReverb effect targets this specific problem without cutting the frequencies where potential EVP content lives.
Use the DeReverb Effect
Open Effects > Noise Reduction / Restoration > DeReverb. The dialog gives you a single primary slider labeled Amount, which controls how aggressively Audition suppresses the reverb tail in your recording. Start the Amount slider between 20 and 30 percent and preview the result before moving it further in either direction.
Pushing DeReverb above 40 percent on investigation recordings frequently produces a hollow, phasey quality that makes your audio harder to evaluate, not easier.
The settings table below gives you a practical starting framework based on common investigation environments:
| Environment | Recommended Amount | Notes |
|---|---|---|
| Small residential room | 20-25% | Minimal reverb; light treatment only |
| Large open hall or ballroom | 30-40% | Higher decay; increase gradually |
| Stone basement or vault | 35-45% | Dense reflections; monitor for artifacts |
| Outdoor with hard surfaces | 15-20% | Wind more likely issue than reverb |
After applying, zoom into the Spectral Frequency Display and look at sections where you hear clear audio events. The high-frequency smear that trails behind transients should be visibly reduced without leaving a gap or dropout in the spectrogram.
Adjust Room Tone with a High-Pass Filter
Room tone is low-frequency energy below 80 Hz that accumulates in investigation spaces from building structure, distant traffic, or ground vibration. It is not hum with a defined pitch, but rather a diffuse rumble that raises your overall noise floor. A high-pass filter cuts this energy cleanly without touching the frequency range where voices and anomalous audio typically occur.
Open Effects > Filter and EQ > Scientific Filters and select Butterworth as the filter type. Set the cutoff frequency to 80 Hz with a slope of 12 dB per octave and apply it to your working file. If your investigation captured audio events with deep tonal characteristics, drop the cutoff to 60 Hz to avoid removing any relevant content along with the room tone. Preview the result against your original working file before committing to confirm you have not over-filtered the low end.
Step 7. Set loudness and export clean audio
You have cleaned the noise, removed the hum, and addressed reverb, but your file is not ready to share or archive yet. Loudness normalization ensures that your cleaned recording plays back at a consistent level across different devices and playback environments. Without this step, quiet investigation recordings often sit too low for careful listening, and listeners who turn up their volume to compensate will also amplify whatever residual noise remains after your adobe audition noise reduction work.
Normalize loudness with the Match Loudness panel
Open the Match Loudness panel by navigating to Window > Match Loudness. Drag your cleaned working file into the panel. Set the target loudness to -16 LUFS for general review and sharing purposes. If you are submitting audio as evidence for a research group or podcast, confirm whether the recipient has a specific loudness standard before you apply any normalization, and match that target instead.
-16 LUFS gives you enough headroom to prevent clipping while keeping the audio loud enough for critical listening during evidence review.
The Match Loudness panel also lets you process multiple files simultaneously, which is useful when you have cleaned several recordings from the same investigation night and want consistent playback levels across all of them. Load each cleaned file into the panel, set the same -16 LUFS target for all of them, and run the normalization in a single pass.
Export settings for paranormal audio files
Select File > Export > File to open the export dialog. Your format choice here determines how much audio information survives the export, so use the settings that match the purpose of each file. The table below covers the most common export scenarios for investigation audio:
| Use Case | Format | Bit Depth | Sample Rate |
|---|---|---|---|
| Long-term archival | WAV | 24-bit | 48000 Hz |
| Sharing with research partners | WAV | 16-bit | 44100 Hz |
| Podcast or online publishing | MP3 | 320 kbps | 44100 Hz |
| Personal backup copy | AIFF | 24-bit | 48000 Hz |
Always save your exported file into the Exports subfolder you created during setup, and include the date and location in the filename. A clear naming convention like “Waverly_Hills_2026_05_10_Clean_Final.wav” means you can locate and identify any file months later without opening it first. Never overwrite your working file with the export, and keep your Raw and Working versions intact on the same drive alongside the finished export.

Next steps for cleaner evidence audio
You now have a complete adobe audition noise reduction workflow that takes raw investigation recordings from a noisy, cluttered state to clean, reviewable audio. Each step builds on the previous one, from capturing an accurate noise print and applying broadband reduction to targeting hum, clicks, reverb, and room tone as separate problems. Consistent results come from running this process in the same order every time, not from pushing any single tool harder than it should go.
Your audio workflow is only as strong as the gear you bring into the field. Better recording equipment captures a cleaner signal from the start, which means less work during cleanup and less risk of processing artifacts masking genuine anomalies. If your current recorder, EMF meter, or microphone setup is holding your evidence quality back, browse the paranormal investigation equipment at Haunt Gears to find tools built for serious fieldwork.