

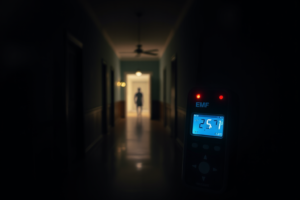
You walk into a dark hallway, the air feels heavy, and your EMF meter jumps from calm to flashing like a pinball machine. That moment can either become solid, documentable data – or a false alarm you could have avoided with a two-minute sweep.
An EMF meter is one of the fastest tools for turning “I felt something” into “I measured something.” But it only helps if you run it like an investigator, not like a prop. Below is a field-ready approach to how to use an emf meter for paranormal investigation, with the trade-offs, the common traps, and the habits that make your readings harder to explain away.
What an EMF meter can (and can’t) prove
An EMF meter measures electromagnetic fields. In most haunted-location conversations, the idea is that unexplained EMF changes may correlate with reported activity – especially if they occur alongside other cues like knocks, cold spots, device interference, or EVP.
What it cannot do is label a reading “paranormal.” EMF is everywhere in the modern world: wiring behind walls, outlets, breaker panels, routers, smart TVs, refrigerators, even a phone searching for signal. Your job is to separate normal sources from anomalies, then document the context well enough that another investigator could retrace your steps.
The win is not “big numbers.” The win is a spike you can’t replicate with known sources, that aligns with time, location, and other data.
Pick the right type of EMF meter for your style
Not all EMF meters behave the same in the field. Some are designed for electricians and home inspections, and some are designed for quick ghost-hunting feedback.
A single-axis “K-II style” meter is simple and fast: lights jump, you react, cameras catch it. The trade-off is resolution and specificity. You often don’t know if you’re catching a narrow hotspot from wiring or a broader field change.
A tri-field meter can read electric, magnetic, and radio frequency ranges, which is helpful when you’re trying to identify whether a spike is likely coming from a power source or an RF-heavy environment. The trade-off is complexity – more ranges means more chances to misread what you’re seeing.
A digital EMF meter (especially one that shows numeric values) is usually better for documentation because you can log “0.6 mG baseline, peaked at 7.2 mG for 4 seconds” instead of “it lit up.” The trade-off is that some digital meters update slower, and you can miss quick transients if you’re not watching closely.
If you’re filming investigations, many teams carry both: a fast visual meter for on-camera moments and a digital meter for evidence notes.
Before you investigate: build a baseline like you mean it
The biggest mistake with EMF is starting where you expect a ghost and treating the first spike as the story. Do the boring part first. It’s what makes the exciting part credible.
Start outside or in a known neutral area and note what your meter reads when it should be calm. Then work your way inside with a deliberate baseline sweep. Move slowly, hold the meter at chest height, and avoid brushing it against your body or clothing (static and movement can create noise on some units).
Your first sweep is not a “ghost check.” It’s a map of normal.
Do a room scan in layers
A solid baseline takes less than 10 minutes per room once you get the rhythm.
Scan at three heights: near the floor, at chest height, and near the ceiling line. Old homes can have wiring that runs oddly, and certain hotspots only show up near baseboards or around ceiling fixtures.
Then trace the walls. Outlets, switches, breaker-adjacent walls, and appliance backs are the usual suspects. If you find a consistent hotspot, mark it in your notes as “environmental EMF.” That way you don’t “discover” it again later at 1:00 a.m.
Identify the biggest false positives early
If you’re in a residential or commercial location, expect these to show up during baseline:
- Active electrical panels and meter boxes
- Extension cords and power strips (especially cheap ones)
- Old fluorescent lighting and dimmer switches
- Wi-Fi routers and smart home hubs
- Refrigerators, HVAC motors, and fans
You don’t need to eliminate every source. You need to understand what’s unavoidable and what can be controlled.
During the investigation: use an EMF meter with discipline
Once your baseline is set, you can start using your EMF meter as an event detector rather than a constant distraction.
Hold position, don’t “chase the lights”
When you see a spike, your instinct is to move the meter around fast to “find it.” That’s exactly how you accidentally sweep past an outlet, a phone in someone’s pocket, or a cable in the wall and convince yourself something followed you.
Instead, freeze for a moment. Call out the time. Keep the meter in the same orientation and see if the reading sustains. Then change one variable at a time: take a step forward, then back. Raise it, then lower it. If the spike behaves like a fixed source (stronger near one spot, weaker as you back away), you’ve likely found wiring or a device. If it blooms, collapses, and doesn’t map cleanly to distance or location, it’s worth documenting as an anomaly – not as proof, but as a moment.
Control your own contamination
Investigators create EMF noise constantly. Phones, radios, body cams, IR illuminators, even some battery packs can trigger readings depending on the meter type and sensitivity.
Before a session, agree on a “quiet protocol” for the room you’re working: phones on airplane mode (or placed outside), walkies limited, and no one stepping in with a running live-stream rig unless you’ve tested it against the meter.
If you’re running a spirit box or other active electronics, do a quick test: hold your EMF meter near it at different distances and note what “normal interference” looks like. Some setups will guarantee elevated readings within a couple feet, and that’s not paranormal – it’s just your gear talking to your gear.
Use call-and-response carefully
A popular method is to ask for a spike on command: “If you’re here, light it to red.” This can be useful as a trigger test, but only if your environment is controlled and your baseline is clean.
Treat it like this: ask the question, keep everyone still, and watch for a change that is both timed to the question and not reproducible by moving toward known EMF sources. If the meter spikes right after you asked, then does it again when you ask again, and then stops when you stop? That pattern is more interesting than one random jump.
“It depends” matters here. In a building with messy wiring, command-based spikes are almost impossible to trust. In a quiet, powered-down area where you’ve already mapped hotspots, they’re more meaningful.
How to document EMF events so they hold up later
If you want your evidence to survive your own skepticism tomorrow, document it like you’re going to hand it to another team.
When you get a notable EMF event, capture four things: exact time, exact location, meter type, and what else was happening. If you’re filming, say it out loud so it lands on audio. If you’re not filming, write it immediately.
Also document the negative: “No nearby outlets,” “Breaker panel on opposite wall,” “Phones outside room,” “Spirit box off.” Those statements are what make the event testable.
If you can safely do it, run a quick replication check. Walk the same path again. Recreate the same stance. If the spike repeats in the same place every time, you’ve probably identified environmental EMF. That’s not a failure – it’s a debunk, and debunks make your remaining events stronger.
Interpreting spikes: what’s actually compelling?
A single high reading is rarely the headline. Investigations get interesting when the data behaves strangely.
A compelling EMF moment tends to have at least one of these traits: it’s transient (appears and vanishes), it’s mobile in a way that doesn’t track to a fixed source, or it coincides with another independent data point like an EVP timestamp, a distinct sound captured on a static recorder, or a temperature change on a thermal device.
Be wary of “stacked excitement,” where everyone starts moving, talking, and turning on gear at the same time. That’s when your EMF meter becomes a stress meter for your own investigation.
Pairing EMF with other tools for stronger sessions
EMF works best when it’s part of a system. If your only data is a blinking meter, you’ll always be arguing with wiring.
If you’re running EVP recorders, call out EMF spikes verbally so the audio file gets a timestamp anchor. If you’re using infrared or night vision cameras, keep the EMF meter in frame when possible so viewers can see when the reading changed. If you have a thermal camera, use it to check whether the “cold spot” story matches any measurable temperature shift or if it’s just draft behavior.
The goal is not to overwhelm a location with gadgets. It’s to create cross-checks. One tool reacts, another one confirms the context.
A quick field routine you’ll actually stick with
Most investigators don’t fail because they lack knowledge. They fail because they don’t have a repeatable routine when adrenaline hits.
Do a baseline sweep first. Mark hotspots. Control your team’s electronics. When a spike happens, hold still, log time and location, and test distance and orientation before you declare it “moving.” Then try to correlate it with your other recordings.
If you want a gear-first approach to building that kit around your investigation style, you can browse categories and research-driven picks at HauntGears.
The best part about using an EMF meter well is that it doesn’t just help you catch something strange – it helps you confidently say, “That wasn’t it,” and keep hunting until you find the moment that still makes sense in daylight.
Discover more from Haunt Gears
Subscribe to get the latest posts sent to your email.

Leave a Reply
Your email is safe with us.